How to Send Embed Messages on Discord? [Step-by-Step]
Discord has revolutionized how we communicate online, especially within gaming and tech communities. One of its many features is the ability to send ’embed messages.’
Often rich in content and formatting, these messages stand out and can be incredibly useful for announcements, instructions, or just adding flair to your chat.
In this guide, we’ll guide you on how to send embed messages on Discord.
TO THE POINT:
You can send embedded messages on Discord using Discohook.
Firstly, you’ll have to create a webhook from your preferred Discord channel. Secondly, you have to paste the Webhook URL into Discohook, click on the “Embed” button, and type the title of your message. The, type the content of your message.
Finally, click the “Send” message to send the embedded message to your server channel. The message will appear in your Discord server’s channel.
DID YOU KNOW: How to Log Out of All Devices on Discord? [Step-by-Step]
How to Send Embed Messages on Discord?
Embed messages are special types of messages that allow for richer content. Unlike regular text messages, embeds can include titles, descriptions, fields, colors, and even images. Think of them as mini webpages or interactive panels within your Discord chat.
Embed messages can enhance communication in various ways:
- Announcements: Make important announcements stand out with a custom embed message.
- Guides and Tutorials: Use fields in embed messages to structure guides or tutorials.
- Event Details: Share event details in an organized manner, including time, date, and location fields.
- Fun and Engagement: Spice up daily conversations with visually appealing messages.
NOTE:
You must have administrative privileges to the server where you want to send embedded messages.
Follow the steps below:
First, you’ll need to create a webhook in your channel. You can also use any already created webhook.
STEP 1: Open the Discord Desktop app on your device.
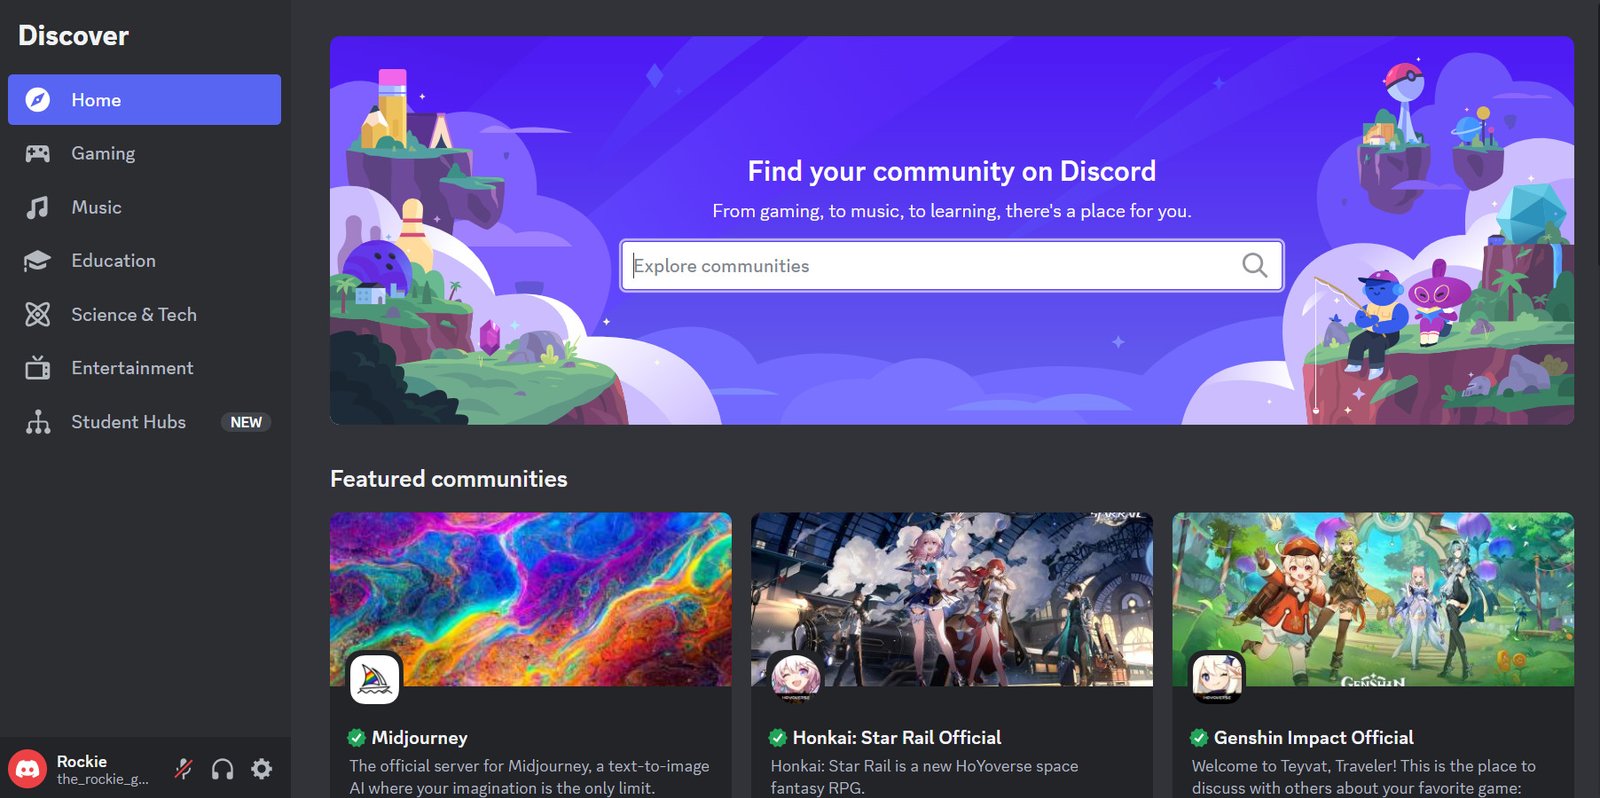
STEP 2: Go to your preferred server and select the channel where you want to send the embedded message.
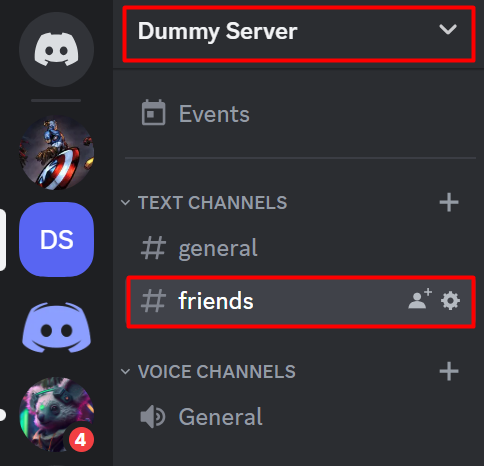
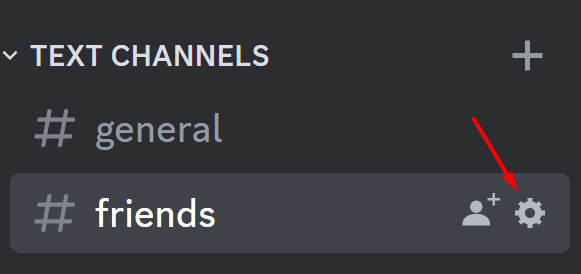
STEP 3: Click on the “Edit Channel” gear icon in front of the channel name.
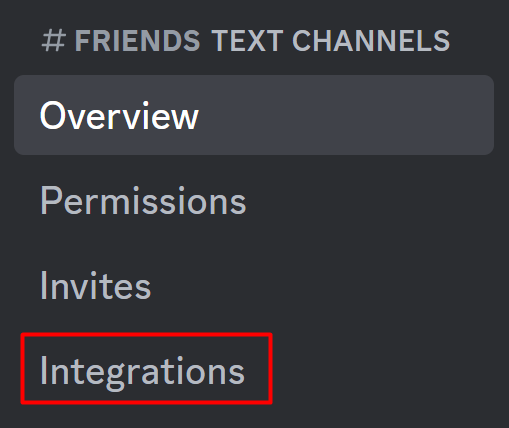
STEP 4: From the left navigational panel, go to “Integrations”.
STEP 5: Click on the “Create Webhook” button.

STEP 6: Give your webhook a unique name and image. You can also use the already available ones.
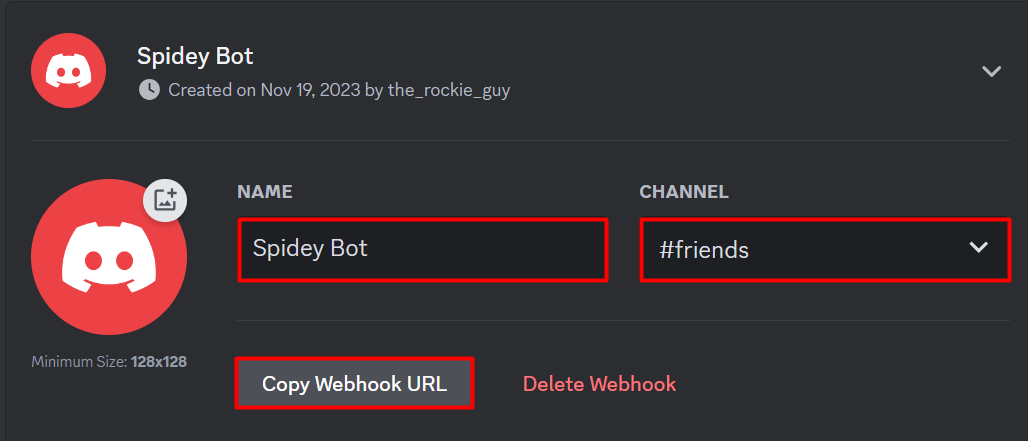
STEP 7: Copy the Webhook URL.
Now, let’s create those embed messages for your Discord channel.
STEP 8: Go to the “Discohook” website and click on “Clear All”.

This will clear all the already written dummy text.
STEP 9: Copy the webhook URL and paste it into the “Webhook URL” box.

STEP 10: Click on the “Add Embed” button.

STEP 11: In the body section, you can give a title of your message. This will be displayed as bold text.
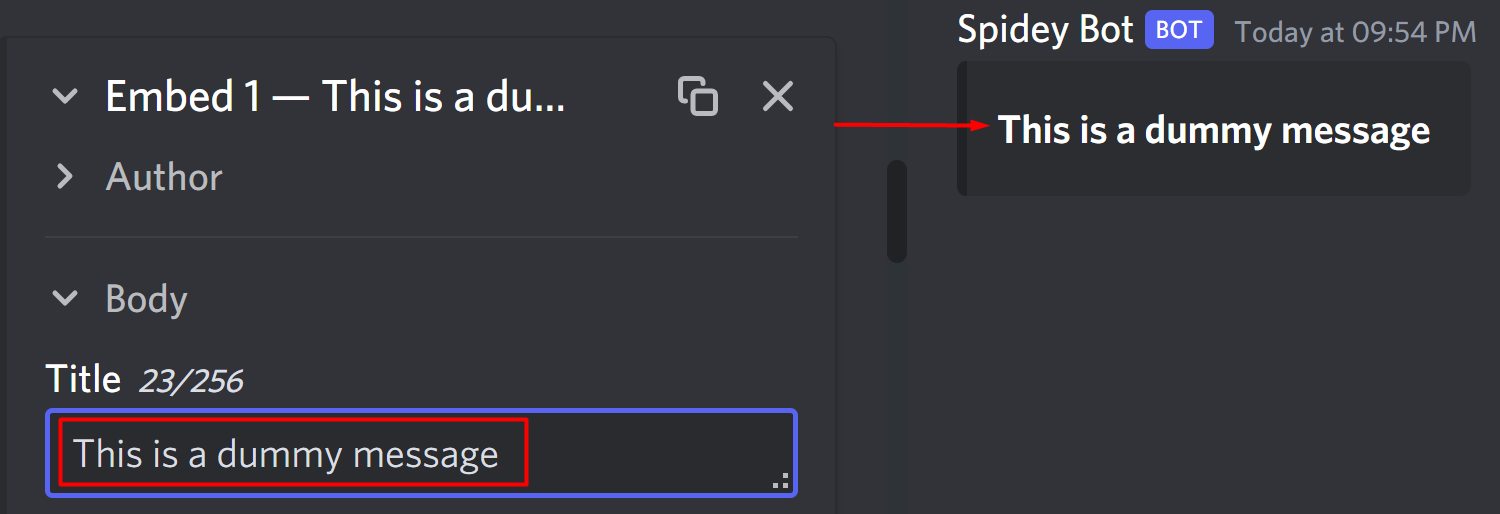
STEP 10: In the description box, write the content of your message.

STEP 11: In the URL box, you can paste a URL that will be linked to your title.

You can also change the color of the left bar of your message.

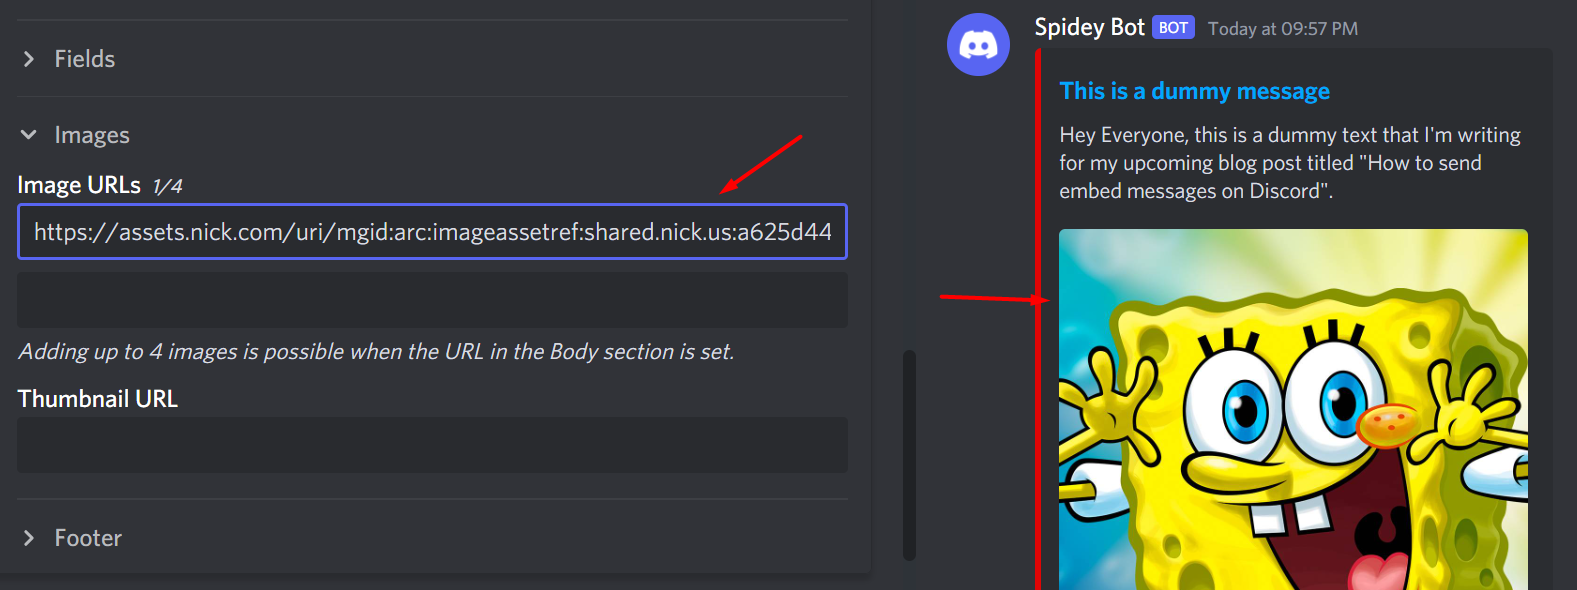
STEP 12: In the images section, you can paste an image address or ID and that image will show in your message.
STEP 13: In the Author section, you can type an Author name, Author image URL, and Author icon URL.

You can play around with the other options too. You can also a footer to your message.
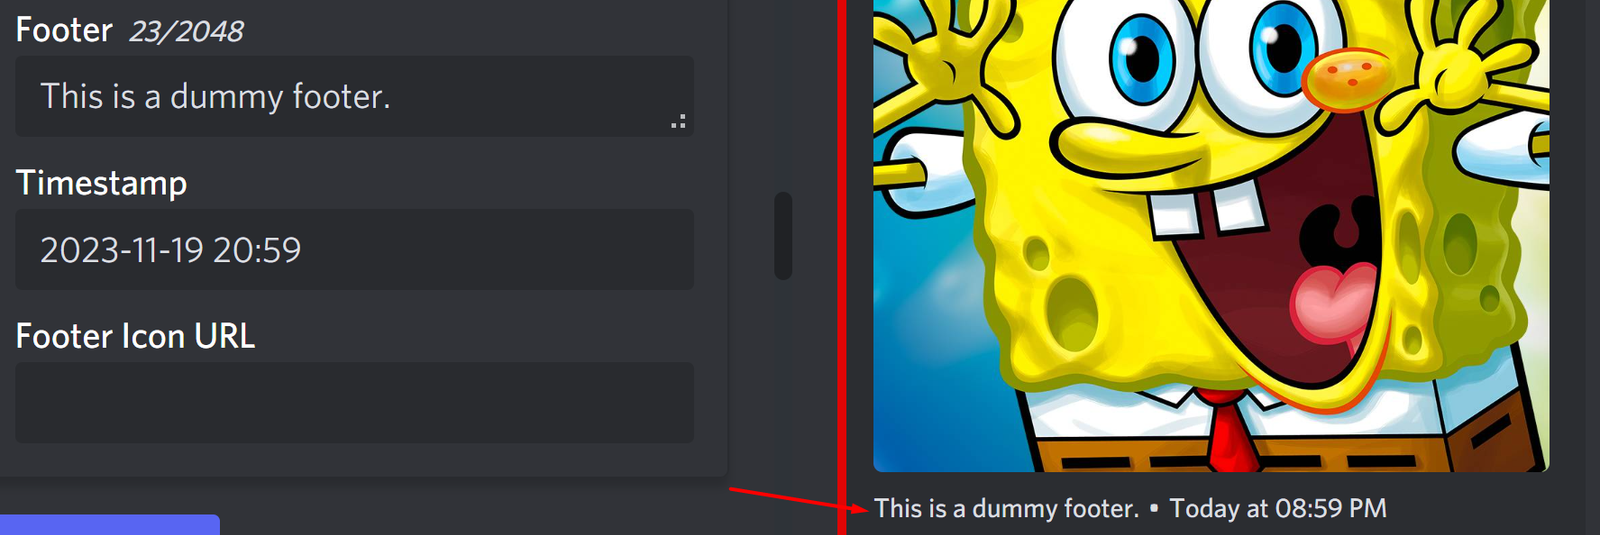
STEP 14: Click on the “Send” button in front of the Webhook URL box to send the embedded message.

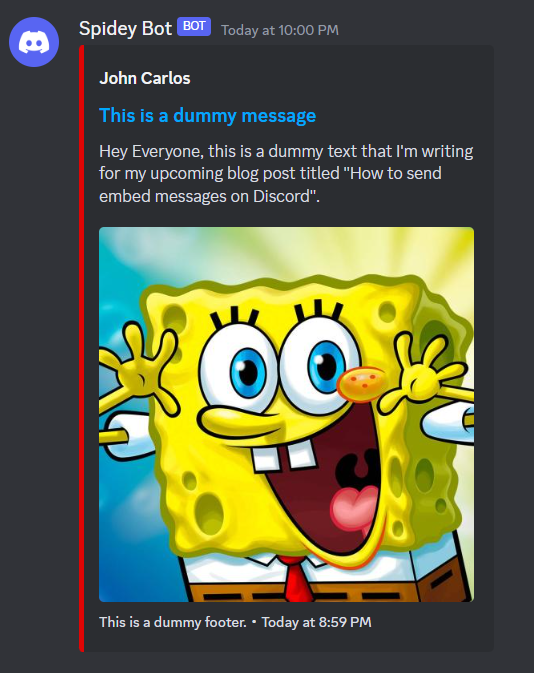
By following these steps, the embedded message will be sent to your Discord channel.
ALSO READ: How Long Does a Discord API Ban Last And How to Avoid It?
Conclusion
Embed messages are a powerful tool in Discord, offering enhanced communication options. By understanding how to create and utilize them effectively, you can significantly improve your interactions on the platform.
Frequently Asked Questions (FAQs)
Can I send embed messages without a bot?
Technically, yes, but it requires knowledge of Discord’s API and coding, which is why using Discohook is the preferred method.
Can embed messages be edited after sending?
Yes, using Discohook, you can edit your embedded message once you’ve sent it. We’ll cover that in another article soon.

