How to Renew Listing on Facebook Marketplace?

Renewing a listing on Facebook Marketplace is a simple process that can help you keep your items visible to potential buyers. When you renew a listing, it moves to the top of the search results, making it more likely that someone will see it.
In this comprehensive guide, you’ll get to know about renewing listings on Facebook Marketplace.
To renew a listing on Facebook Marketplace, you simply need to click on the “Renew” button next to the item in your listings.
What is Renew Listing on Facebook Marketplace?
Renewing your listings on Facebook Marketplace is a simple process that can help increase your visibility and sales. When you initially list an item for sale, it appears in the marketplace and reaches users searching for similar products.
However, as time passes, the listing may get pushed down in search results due to newer listings. Renewing your listings periodically keeps them fresh and visible, increasing the chances of attracting potential buyers.
DID YOU KNOW: HOW TO SET UP PAYPAL ON FACEBOOK MARKETPLACE?
How to Renew Listing on Facebook Marketplace?
On Mobile:
STEP 1: Access Facebook Marketplace

Log in to your Facebook account and navigate to the Facebook Marketplace by clicking on the Marketplace icon on the homepage or in the Facebook app.
STEP 2: Find Your Listings
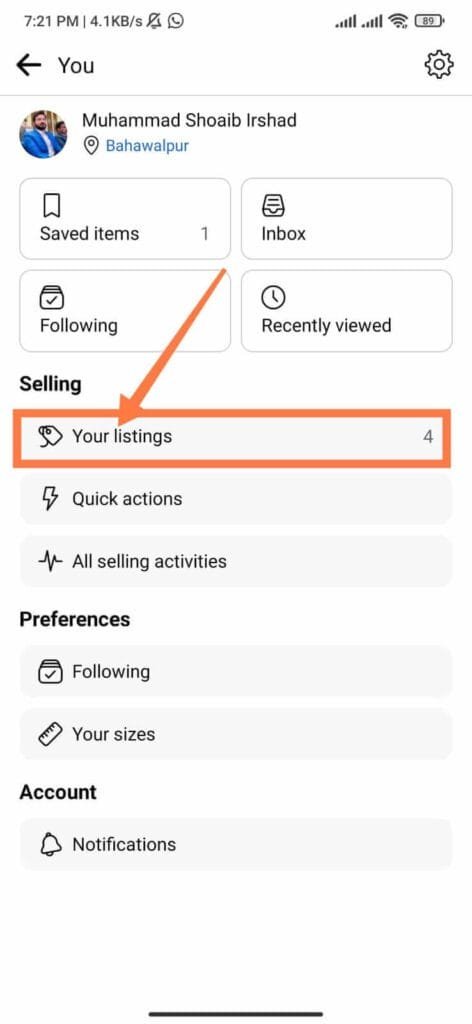
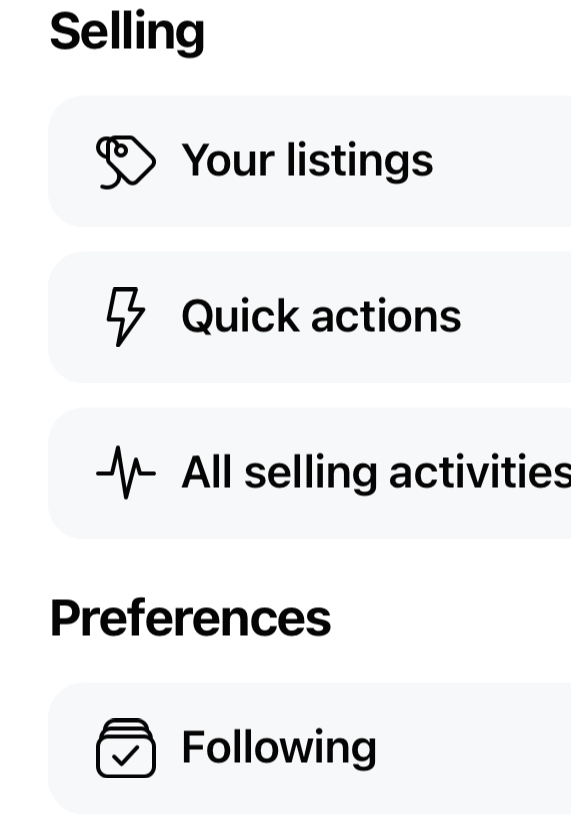
Once you’re on the Facebook Marketplace, locate the “Your Listings” section, where you’ll find all the items you have listed for sale.
STEP 3: Choose the Listing to Renew
Select the listing you wish to renew from your list of items. Click on the listing to open its details page.
STEP 4: Renew the Listing
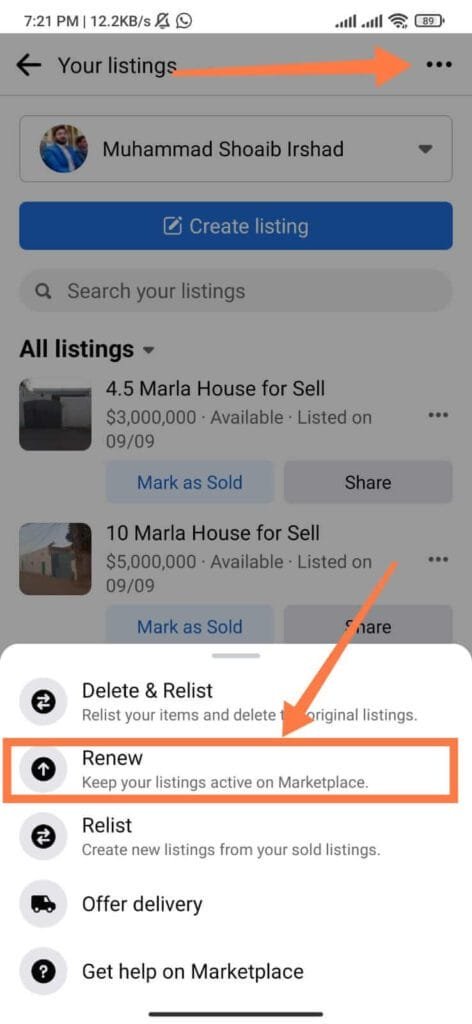
On the listing’s details page, you’ll find an option to “Renew” the listing. Click on this button to renew your listing and bring it back to the top of search results.
STEP 5: Confirm Renewal
After clicking “Renew,” Facebook may prompt you to confirm your action. Verify your decision and proceed with the renewal.
On Desktop:
In order to renew your Facebook Listings on your desktop, follow the steps below.
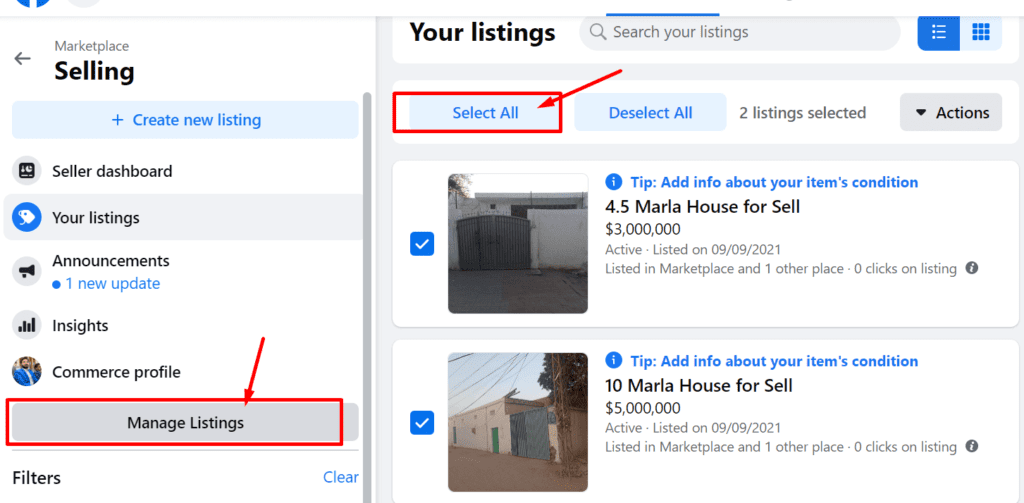
STEP 1: Go to your Facebook Marketplace and click Selling to open your seller’s dashboard.
STEP 2: Click Manage Listings, and then you can either manually select the listings or click “Select All” to select all listings.
STEP 3: Click the “Actions” button and under that select “Renew in Marketplace“.
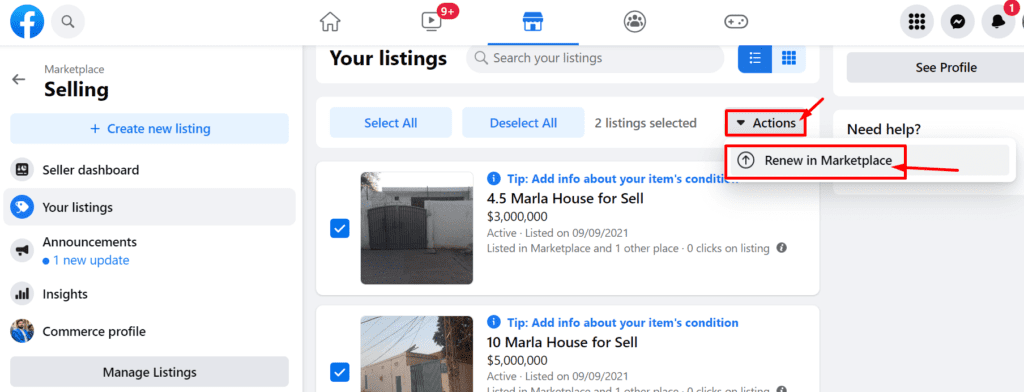
STEP 4: Confirm the listings and click “Renew“. Your listings will be renewed successfully.
On iOS:
STEP 1: Access “Facebook Marketplace” and go to your listings.
STEP 2: Select the listing you want to renew.

STEP 3: Click on “More” and select “Renew in Marketplace”.
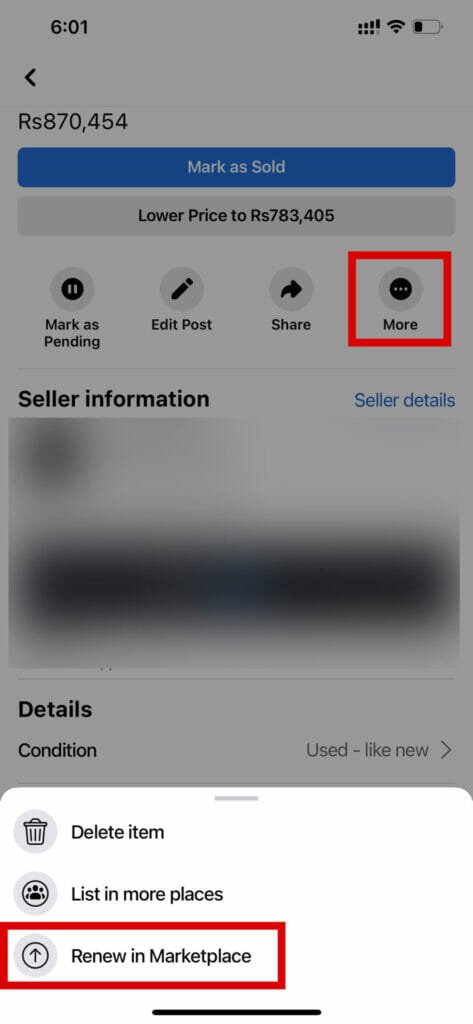
The listing will be opened in Facebook Marketplace and you will be able to renew it by simply clicking on the “Renew Listing” button.
How to Renew Marketplace Listing After 5 Times?
Facebook Marketplace listings can generally be renewed every seven days for a maximum of 4-5 times. After this period, sellers may choose to delete and relist their items to maintain visibility and increase the likelihood of a successful sale. Here’s how to do that:
STEP 1: Go to your Facebook Marketplace and find the listing that you want to renew.
STEP 2: Click on the three dots in the top right corner of the listing.
STEP 3: Select “Delete” from the dropdown menu.
STEP 4: Confirm that you want to delete the listing.
STEP 5: Create a new listing by clicking on “Create New Listing” on the left-hand side of the Marketplace.
STEP 6: Fill out the details of your listing and post it.
ALSO READ: HOW TO DELETE SAVED ITEMS ON FACEBOOK MARKETPLACE?
FAQs
Is there a fee for renewing listings on Facebook Marketplace?
No, renewing listings on Facebook Marketplace is currently free of charge.
Can I renew a listing multiple times?
Yes, you can renew a listing up to 5 times max.